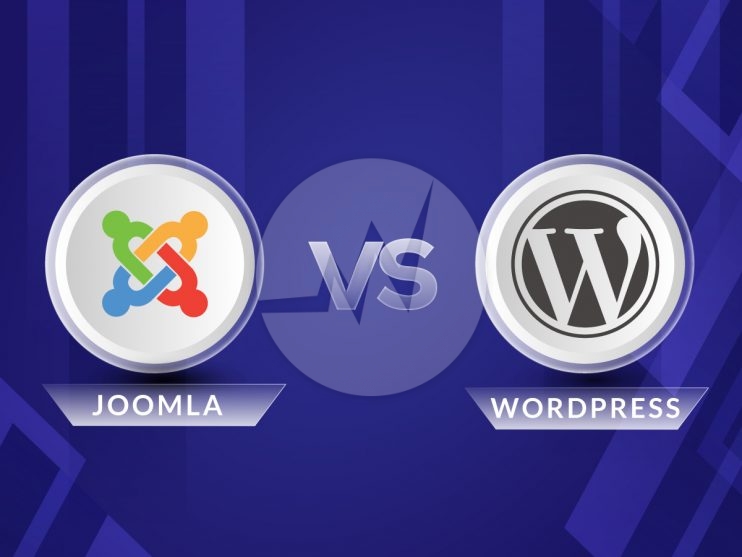
Joomla vs WordPress: Pick the Right CMS for Your Website!

By | Date posted: | Last updated: May 30, 2023
Joomla VS WordPress

The world of website development offers numerous options to build and manage your online presence. With an abundance of options available, two popular choices often stand out: Joomla and WordPress.

Both Joomla and WordPress are robust content management systems (CMS) that empower individuals and businesses to create and maintain their websites effectively. In this article, we will delve into the Joomla vs WordPress debate, helping you navigate the intricate landscape of website development.

YOU MAY ALSO LIKE: Best Ecommerce CMS

What is Joomla?

Let’s kick things off by diving into Joomla. It’s an open-source CMS that has been around for quite some time. Joomla boasts a robust set of features and functionalities that make it a solid choice for many website owners. It’s renowned for its flexibility, allowing you to create various types of websites, from simple blogs to complex e-commerce platforms.

One of Joomla’s standout features is its user management system. If you’re planning to build a website with multiple contributors or a membership-based community, Joomla’s got your back. It offers advanced user permission controls, making it a breeze to manage different user roles and access levels.

But hey, Joomla isn’t without its quirks. It can be a bit more complex to set up and use compared to other CMS options. If you’re a beginner in the web development world, you might need to invest some time in familiarizing yourself with Joomla’s interface and workflow. However, once you get the hang of it, you’ll be able to unleash its full potential.

WordPress: Power and Simplicity Combined

Now, let’s shift our attention to WordPress. If you’ve dipped your toes into the website creation pool before, chances are you’ve come across this juggernaut of a CMS. WordPress powers a staggering number of websites on the internet, and for good reason.

First and foremost, WordPress shines when it comes to ease of use. It has a user-friendly interface that even beginners can navigate effortlessly. Whether you’re a seasoned web developer or a newbie, WordPress’s intuitive dashboard will make you feel right at home.

WordPress also boasts an extensive library of themes and plugins. This allows to customize website to your heart’s content. Whether you’re aiming for a sleek and modern look or a funky and vibrant design, you’ll find a plethora of options to choose from. With the right combination of plugins, you can add powerful functionalities to your site without breaking a sweat.

The WordPress community is another feather in its cap. Thanks to its popularity, you’ll find a vast ecosystem of developers, designers, and enthusiasts who are ready to lend a helping hand. Whether you’re looking for guidance, troubleshooting tips, or inspiration, WordPress’s supportive community has your back.

YOU MAY ALSO LIKE: Improve WordPress Accessibility

Joomla vs WordPress: The Battle of CMS Giants

1. User-Friendliness

While both Joomla and WordPress offer user-friendly interfaces, WordPress takes the lead in terms of simplicity. With its intuitive dashboard, beginners can quickly get the hang of it. On the other hand, Joomla has a steeper learning curve, making it more suitable for those with some technical expertise.

2. Customization Options

When it comes to customization, WordPress shines bright. With thousands of themes and plugins available, you can easily transform your website into a unique online presence. Joomla, although also highly customizable, offers a smaller range of templates and extensions in comparison.

YOU MAY ALSO LIKE: WordPress Ecommerce Development

3. Scalability and Flexibility

If you have plans to expand your website in the future, both Joomla and WordPress can accommodate your needs. However, Joomla is better suited for complex, enterprise-level websites with extensive content and intricate hierarchies. WordPress, on the other hand, is known for its scalability and flexibility, making it a popular choice for various types of websites, from personal blogs to e-commerce stores.

4. Security

When it comes to security, both Joomla and WordPress have robust systems in place. However, due to its larger user base, WordPress has historically been more prone to security vulnerabilities. That said, with regular updates and proper security measures, both platforms can provide a secure environment for your website.

5. SEO-Friendliness

In terms of search engine optimization (SEO), WordPress has a slight advantage. Its clean code structure, extensive plugin support (such as Yoast SEO), and user-friendly URLs contribute to better SEO practices. Joomla, while still SEO-friendly, may require additional configuration to achieve the same level of optimization.

YOU MAY ALSO LIKE: WordPress SEO

6. Community and Support

WordPress boasts a massive and highly active community, which means you can find abundant resources, forums, and tutorials to aid you in your website-building journey. Joomla also has a dedicated community, although it is relatively smaller in comparison. The community size can directly impact the availability of support and updates for each CMS.

Conclusion: Making the Right Choice!

In the battle of Joomla vs WordPress, there is no one-size-fits-all answer. Both CMS platforms have their strengths and weaknesses, catering to different types of websites and user preferences.

If you’re looking for simplicity, a large selection of themes and plugins, and a vibrant community, WordPress is an excellent choice. It’s ideal for bloggers, small business websites, and those seeking a user-friendly experience.

On the other hand, if you have a complex website with intricate content organization, enterprise-level requirements, or a need for native multi-language support, Joomla can be the right technology for your website. It offers robust content management features, advanced user permissions, and scalability.

Ultimately, the choice between Joomla and WordPress depends on your specific needs, technical expertise, and future growth plans. Take the time to evaluate your requirements, explore the features of both CMS platforms, and consider seeking professional advice if needed.

When faced with uncertainty, it’s wise to seek help from a web development company. At Skynet Technologies, we offer expert guidance in choosing the right platform/CMS for your business goals and target audience. Our comprehensive solutions cover popular platforms like Drupal, WordPress, Shopify, BigCommerce, and Joomla. Get a free quote by filling out the form below or emailing us at hello@skynetindia.info.

If you have any questions or would like to know more about how Skynet Technologies can help your business to reach one step ahead, Reach out us through below form & We'll get back to you soon!

A Comprehensive Manual for WordPress Single Site to Multisite Migration

By | Date posted: | Last updated: May 30, 2023
WordPress single site to multisite

Among myriad impeccable features of WordPress, multisite is one of the outstanding features of this exceptional platform. It helps those who want to manage multiple websites without any trouble. They can have a single WordPress installation and can run multiple websites by implementing WordPress single site to multisite migration successfully.

In simple words, an organized network of several websites that run on a single WordPress account is known as multisite network. The benefit of using this feature is that admins can easily maintain all the websites without juggling among different website accounts. There is one super admin who manages the main account and can assign different roles to others.

It is a great way to handle websites that share the same code, core files, plugins, and themes. But if websites are not related to each other or are different, then WordPress’s multisite feature will limit you from managing all the websites from one dashboard.

However, there are chances that you wish to convert your single WordPress site to a multisite because of business expansion, or new brands launch under a single company name, or any other reason. If this is the case, this article is for you.

YOU MAY ALSO LIKE: WordPress Migration Checklist

Important Steps to Take Before Migrating Your Existing Website

So, if you’ve made up your mind to migrate your WordPress single site to multisite, one most crucial thing to follow is taking backup of the website. You can use tools like BackWPup or if you’ve hired some WordPress development agency to perform migration for you, it is their lookout to take backup of the existing website.

Why taking backup is important because it keeps your existing data safe, and you can access it at any point in time if needed. Moreover, when you’ll migrate to a multisite network, many changes will happen to your single site and backup will safeguard you in case of any technical crisis.

Thus, take backup in the first place!

Steps to Migrate a Single Site into Multisite

You are already using a single WordPress website and now planning to migrate it to a multisite, but don’t know how. Well, here is a step-by-step guide to know the process of migrating the website.

So, when you add a multisite feature to your existing WordPress website, it will automatically convert into your primary site in a multisite network. Afterward, you can add other new sub-sites to this network.

If you have multiple existing WordPress sites and you wish to consolidate them at a place, then follow below mentioned steps.

  1. Export all single websites content either by using WordPress plugins or exporting it into a .xml file and then import the content in a new blank sub-site in your multisite network. Plugins will make your work easy and super-fast. However, if doing it manually by creating a .xml file, then login to your WordPress dashboard, go to Tools > Export and WordPress will ask you which content to save. You can select All content (or the pieces you wish to migrate), then click on the Download Export File button. After that, WordPress will generate a .xml file, and the download will begin. It may take some time if the size of the content is larger.
  2. Now add a new sub-site in your multisite network by going to Sites > Add New. To create a new website, configure its URL, admin email, title, and other essential elements. Try to keep this information more or less similar to the previous website, which you are about to migrate to a multisite network. Once you’ve added all required details, click on Add Site and you have a new black site on which you can paste your imported content and start working on its UI/UX as well.
  3. After these two steps, you are expected to set up the plugins and themes for the websites. Plugins you might need from your previous single sites and themes you can change or keep similar to the previous one. The installation process is the same as you install for your single sites.

    However, you need to keep in mind that not all plugins and themes are multisite compatible. So, if a plugin or theme is not supporting your multisite network, find out an alternative for the same. If the installation is done, navigate to the new subsite’s dashboard using the My Sites link in the toolbar and activate themes and plugins.
  4. Now it is time to import the content to your new subsite. Go to Tools > Import in the subsite’s dashboard. Scroll down to find the WordPress option and there you will find the Install Now link, click on that.

    It will install the tool in the background, and you will find a replaced option as Run Importer, click on that. The importer will ask you to select the .xml file which you wish to import. You have to select that file and click on Upload File and import will start.

    Then on the next page, you will be asked to configure other details like author, etc. It will also ask if you want to move all old media files or not. Once you are done with all details, click on Submit. And WordPress will bring all the asked data from the older single site to a new sub-site of the multisite network.

    After all the steps, don’t forget to check the new website, if it is precisely the same as you wanted it to be. And set up 301 redirects to maintain search engine rankings.

YOU MAY ALSO LIKE: Guide for Ecommerce Development

A New Single Site migration into Multisite Network

There can be one more scenario, which is, you want to include a new website into your multisite network. You can add it by following the same steps written above. Take a backup of both single site and multisite network, deactivate plugins of single site, and then begin with the migration process.

Wrapping up

Multisite is a brilliant feature of WordPress, without a doubt. With myriad advantages such as efficient management of websites, greater control over all of them, and easier permission access to concerned persons, it is one of the useful features.

Though it has a few bottlenecks like limitations on database backup and updates, server sharing risk, the site’s interdependency on performance, and limited choice of plugins and themes.

So, if you’ve sensed a need for a multisite network for your single site, hopefully, you’ve thought of its pros and cons to act accordingly.

Please note here that WordPress has plugins and tools (for example, All-in-One WP Migration) to perform export and import from a single site to a multisite network. So that you can safely migrate your data.

Migrate your WordPress single site into a multisite network easily and manage all websites from one account without much fuss!

To migrate your WordPress website, the files, database, domain name, and name servers must be moved in a straightforward process. If you are unsure about the process, you can seek assistance from Skynet Technologies, who offer WordPress web development and maintenance services. Our developers can handle your website migration and provide you with a fully functional new website.

If you have any queries or want to learn how Skynet Technologies can help your business to excel, get in touch with us by completing the request form, and we will respond promptly.

If you have any questions or would like to know more about how Skynet Technologies can help your business to reach one step ahead, Reach out us through below form & We'll get back to you soon!

Here’s the WordPress Migration Checklist you shouldn’t miss

By | Date posted: | Last updated: May 25, 2023
WordPress migration checklist

What thoughts come across your mind when you think of WordPress website migration?

They say, “If you want your website migration to go as smoothly as possible, you need to plan ahead.”

So here is the catch, if you are thinking to migrate your WordPress website, you must have entangled in different thoughts about the benefits and consequences of WordPress migration. However, if planning for migration has been done right then most likely the migration process won’t go wrong and the aftermaths will be in your favour.

WordPress website migration can be done through the plugin, manually, or web host, be it anyways but you must have your migration checklist ready before you start the migration. If you follow the checklist and go step by step, the migration process will be smoother.

So, shall we discuss the WordPress migration checklist to ensure you will have a seamless migration process and after migration, the SEO of your website will intact the same as it was before migration?

YOU MAY ALSO LIKE: WordPress SEO Tips

Do you know the types of WordPress website migration?

To put it simply, website migration is relocating your website from one server to another or an old domain to the new one. If you are moving your website to a server from your local environment, it is also migration.

So, mainly we have five types of migration which are

  • Migrating from local environment to server
  • Migrating from one host to another
  • Changing domain name
  • Migrating to a different host with a changed domain name
  • Moving from subdomain to primary domain

YOU MAY ALSO LIKE: Joomla VS WordPress

WordPress Website Migration Checklist

Pre-Migration

1. Take Database Backup

Despite you regularly taking backups of your website, you must make sure to take complete database backup of WordPress website before starting the migration. The best way to take a backup is to export data in SQL zip files.

In WordPress staging to live site migration, it is easy to transfer data from one site to another because you are only updating the site not the platform. WordPress has a plugin for this task called WP Migrate DB Pro. It is a premium plugin that helps you to import data from one WordPress site to another.

This plugin assists in finding and replacing all the instances from the staging URL to the destination URL. What else do you want? WP Migrate DB Pro makes this migration process hassle-free.
Small WordPress sites can also use WordPress Importer for migration, however, using SQL database is safer, especially for bigger sites. WordPress Importer is useful for migrating data from another platform to WordPress as well. Also, don’t forget to check with Importing Content page on the WordPress Codex for migration instructions if you are migrating from another platform to WordPress.

Moreover, while you are moving from some other platform to WordPress, go for a staging environment first to ensure the website’s content, layout, and other settings are in place, and then move to a live WordPress site.

Most importantly, keep your original site live until your WordPress website is ready to launch. Because if anything goes wrong, you have your original website and you can keep checking the original information while the migration process. Once you pull the plug on your original site, you cannot go back to it. So, double-check everything before switching to the new WordPress website.

YOU MAY ALSO LIKE: WordPress Maintenace Checklist

2. If required, purchase a new domain name and set it up

If the reason behind migration is setting a new domain name for rebranding, then you need to buy a new one. Thus, purchase and set up the domain name if you haven’t done it yet.

3. WordPress installation on your destination site

Mostly, you get one click installation facility from many hosting providers and even better, some does this work for you if you take domain name from them. You also have options to install it manually and from cPanel (a control panel for web hosting). If cPanel is unavailable, then manual is the only option.

4. Get FTP credentials ready for your destination site

FTP credentials are required to connect to the new server either using plugin or manually. These credentials have host/server address, FTP username, FTP password, and port number; the information is essential to get in new website. Always use SFTP (secure version of FTP) for robust system.

5. Put the site in maintenance mode

If site is in maintenance mode, other users will not be able to make changes that can impact migration. Thus, putting site in maintenance mode while migration process is always a safe option.

6. Disable caching, redirect plugins, and firewall

These elements can cause trouble during migration. Therefore, disable them and once migration is done, then you can activate them again.

7. Put new site into no-index mode

Otherwise, it will compete with your existing site and influence traffic and SEO. Once you complete the migration process, don’t forget to remove no-index to make sure web crawlers will start indexing the new WordPress site.

8. WP-Content Files

Your WordPress database stores the posts, pages, and menus however, it doesn’t store images, PDFs, audio files, and theme files or plugins. Thus, you need to download these elements separately.

In short, the elements in the WP-Content folder ought to be saved separately without failure, and before final migration, ensure you’ve uploaded all these to the new server. An FTP tool like Filezilla or CyberDuck can be used to download and upload these files directly to the new server from the older one. Large websites will take time, thus plan accordingly.

9. Original Hosting Check

Check your original hosting and its resources if you are thinking of migrating. One of the prominent reasons behind migration can be hosting issues. Slow hosting causes website performance issues and thus you are left with no other option but to migrate to another hosting.

Investing in good hosting can be a little expensive but it pays off well. Therefore, if your hosting server is no longer performing well, migrate your site to good hosting by adhering to the same process, go for staging server first and then to the production server.

10. Some Additional Stuff to Check

Before you export your data to a new server, make sure it is infection-free and clean because contaminated data will continue hampering the website’s performance in a new environment as well.

A few WordPress hosts scan malware presence in the database. However, some infections in your plugins, extensions, and other theme files may not be detected and can infect the entire new system as well. Obviously, the malware is not easy to spot. Thus, keep scanning the database and if you are completely certain, then migrate it to a new environment.

Post-Migration

1. Search and replace instances in your database if you’ve changed the domain name

With changed domain name, you need to be more careful while moving database files. Only transferring these files is not enough because there can be references to your old domain name in the database. Therefore, search for every instance in your old URL database and replace them with new ones.

Disable maintenance mode in the admin panel, which you’ve activated during migration.

2. Clear all the caches

Browser’s cache, WordPress cache, plugin cache, etc., clear all of them. Caches store copies of different pieces of site information. After you make changes, you need to clear them so that changes can be visible to all the visitors.

3. Test all the components of the site

After migration, it is important to test all the pages, posts, hyperlinks, images, ads, analytics code snippets, etc. to make sure all these components are working well.

4. If new URL don’t have HTTPS, it is important to activate SSL on the new site

To have completely secured environment, activate SSL certificate to your new site. SSL encryption is important to ensure visitors’ data safety. If your site doesn’t have HTTPS, then Chrome will flag your website as not secured that will impact the traffic.

5. If moved to new domain name, set up 301 redirects

The 301 redirects are the safest way to point your old URL towards new one. If visitors are unaware of your new domain name, then 301 redirects send them to the new site. Set up it such a way that all the links will end up at the final URL.

6. Avoid 404 Error

Test the site completely to evade 404 errors. Ensure redirects are not leading to 404 pages.

7. Changing Name Servers of Domain Name

The name servers of the domain name ought to get changed before you finalize the migration. As you know, Name servers inform the domain name to which server they should point. If your migration work is done and your staging WordPress site is ready to go live, then the only work left is to change the Name servers.

Please note, the domain name can take time to point toward the new server; it can be a few hours or days. This span is called domain propagation. The reason behind domain name takes time for this change is that ISPs (Internet Service Providers) have their process to refresh their records for your domain name. Thus, give it some time to point toward the new server.

  • Set up Google Analytics and Google Search Console for new website.
  • Also, crawl your website to see if it is returning any sort of error. Use plugin like Screaming Frog SEO Spider to perform crawling.
  • To fix duplicate content issue, add canonical tags as and when required. Duplicate content influences SEO of the website.
  • Email or message your subscribers or users about changed domain name to make their surfing with your WordPress website easier.
  • Don’t forget to deactivate the old URL, once the new site is live without errors

WordPress migration can be effortless work!

Yes, if is done right, the WordPress migration process can turn a smooth and hassle-free work. Before you migrate, make sure to check the above points. However, WordPress itself made this process easier by providing free and paid plugins for migration.

There is free plugin like WP Move that help you to migrate your website. But make a note, these plugins only work if both the servers (existing and the new one) are running on updated software. Also, for large-sized websites, the plugins are not advisable because they may take more time than manual migration, and also large websites have a colossal database that needs minute observation for an unerring new website.

It is a simple process of moving files, then the database, and then domain name and name servers. Still confused, contact Skynet Technologies for WordPress web development and WordPress maintenance service. Our developer will execute migration for your website and provide a fully functional new website. Fill out the form below to know more about our other service.

If you have any questions or would like to know more about how Skynet Technologies can help your business to reach one step ahead, Reach out us through below form & We'll get back to you soon!

A comprehensive guide for WordPress ecommerce development

By | Date posted: | Last updated: June 29, 2022
WordPress Ecommerce Development

WordPress is a popular platform and the reason behind its popularity is quite evident; it has enough features and functionalities to build and manage an efficient ecommerce store. Also, WordPress offers ease of use.

The number of ecommerce websites developed on WordPress is increasing significantly. Think once, why are organizations using this platform more and more? The obvious answer is its trustworthiness and proven track record. Ecommerce is full of challenges and WordPress is capable enough to handle those challenges. It understands your business needs and helps you to get an appropriate solution, which can withstand market pressure and competition & offer an unmatched level of customer satisfaction.

Steps for WordPress ecommerce development

Pick a perfect domain name

Choose a unique domain name for your ecommerce website. A name that is easy to remember and suitable for your business and industry.

Look for a reliable B2B web hosting provider

A web hosting provider is responsible for making your ecommerce website online available for your users. Hosting decides the loading speed of the website, which impacts the conversion rate. Also, it ensures uptime and downtime of your ecommerce store. Thus, it is crucial to find a good hosting provider.

Install and configure WooCommerce

To set up an ecommerce store with WordPress, you need to install the WooCommerce plugin. It is an open-source plugin but some of its extensions are paid. WooCommerce helps you with product pages, shopping cart and checkout process, secure payment, shipping options and label printing, integration with Google Analytics 4, Mailchimp, etc.

From product pages to checkout page, payment and shipping, everything is critical in ecommerce and WooCommerce has in-built feature to add these options easily to start an ecommerce store.

Once you’ve installed the WooCommerce plugin, add your business details (some basic details which are easy to enter). Then add all the possible payment methods. Ecommerce cannot go further without digital payment options. As the demand for ecommerce stores is increasing, digital and mobile wallets are also capturing the hold on market. Additionally, an ecommerce store can’t execute with only one or two payment options. Therefore, integrate with as many payment options as you can. Options like wallets – Gpay and Apple Pay, cards – debit and credit, pay cash on delivery, pay via card on delivery, PayPal, etc.

After payment gateway integration, you need to fill in the shipping charges and other shipping details. You can set the shipping charges as per different areas or can fix one default charge for every location or can set it as shipping free. Moreover, integrate with logistic vendors for orders’ shipping. Make sure you provide absolute clear shipping and return/refund policies. Don’t surprise customers with unexpected charges or confusion. It can cause higher bounce rates.
Finally, there is the Jetpack option, which enables payment setup and automates tax calculation. You must activate Jetpack and you are all sorted, WooCommerce web development will take care of everything.

Choose an attractive theme

The theme for ecommerce store must be relevant and trending. You can choose the theme from the WordPress library or purchase any one theme from some third-party vendor. Though WordPress is an efficient CMS, and it has competent themes but if your business requires a theme that you cannot find in the WordPress library then buying a third-party theme can be an option. Choose the theme carefully that is best suited to your business and new market trends. Take your time to peruse the theme library and then pick one. Moreover, try to select one lightweight theme because heavyweight themes are a problem with the website’s performance.

Create all the required pages

Do not make a complex ecommerce website structure yet create all the important pages for the website so that users can navigate through it easily. Pages like – Home page, landing page, about us, FAQs (Frequently Asked Questions), terms and conditions, privacy policy, contact, products, Wishlist, cart, and checkout pages are must to have in an ecommerce website.

Add products to product pages

Now it’s time to add the products to your WordPress ecommerce store. Product category, name, price, description, and product image, start adding as many products as you have. Once you add the products with their key information, you ought to fill in some other details. For example, add the taxes per product, affix SKUs to maintain the inventory, and product attributes (if the products have variables like size, color, options, etc.). And you are done with product augmentation. There are multiple ways to optimize your ecommerce store product pages as well.

Install plugins that are essential for your ecommerce website

After all these steps, choose essential and crucial plugins that help your website to flourish and soar higher. For example: If you wish to improve your digital marketing strategies via email marketing, WordPress has the Mailchimp plugin. Similarly, for push notifications, social media, etc. there are different plugins. WordPress is good with digital marketing campaigns; you just need to use the right plugins. Additionally, you can try plugins for search engine optimization, marketing analytics, security, site reviews, and for every critical facet of your ecommerce website.

Start content creation

Content is the backbone of every website including an ecommerce store. After ecommerce store setup and product enlisting is done, it’s time to create engaging content for users. It includes micro copy (UX copy), product description, privacy policy, terms and conditions, FAQs, disclaimer, etc.

Moreover, adding appealing CTAs which can force customers to take further actions. You must include error messages and navigational copy; write every detail carefully.

Personalized content will be needed for the shopping cart and other pages as well. WordPress has the option to select the privacy policy page before you make your ecommerce site live. Implementing ecommerce store personalization will enhance the user experience.

Launch the ecommerce website

After all these efforts, if you are convinced with the design, content, and other stuff of the website, you are good to launch it for customers. When you add a privacy policy, after that there is an option to make your ecommerce website ‘Public’.

Run A/B testing

The A/B testing or split testing must run in a loop to measure the performance of each element on the WordPress website. The testing helps you to analyse the performance of the website based on an array of metrics. Test and discover how well all the pages and elements are performing and if not, then act accordingly to uplift the performance of that element or page. A/B testing is helpful in improving the visitors time on website and hence the conversion rate.

Wrapping up

Albeit WordPress is easy to use and create, however, you should have a little technical knowledge to build your WordPress ecommerce website because it makes ecommerce creation easier and more effective. You can also hire a WordPress developer for an efficacious and productive ecommerce development.

Create a WordPress ecommerce website that leaves its impression deep into customers’ minds. Thus, if at times, the website faces downtime, your business will never witness any downtime or disruption.

As a leading WordPress Development Company, we offer custom WordPress web development, WordPress development, WooCommerce store development and other related web development services. We also offer WooCommerce store maintenance, WooCommerce support services, WooCommerce store customization, or any other WooCommerce solution-related services for any size of business. We also provide one-stop e-commerce solutions from consulting, planning, consulting, design, development, migration, revamp, e-commerce website maintenance, and more to achieve your goals! We look forward to discussing your ecommerce projects and helping you to achieve your target. Our ecommerce team of experts is available to take up any challenges for the next generation ecommerce store you want!

If you have any questions or would like to know more about how Skynet Technologies can help your business to reach one step ahead, Reach out us through below form & We'll get back to you soon!