Mail for Mac
1. Start the Mail application.
2. Click Mail ‣ Preferences…. Mail’s preferences window appears.
3. Click Accounts. The list of mail accounts appears.
4. Click the + (plus) button. The Choose mail account to add dialog appears:
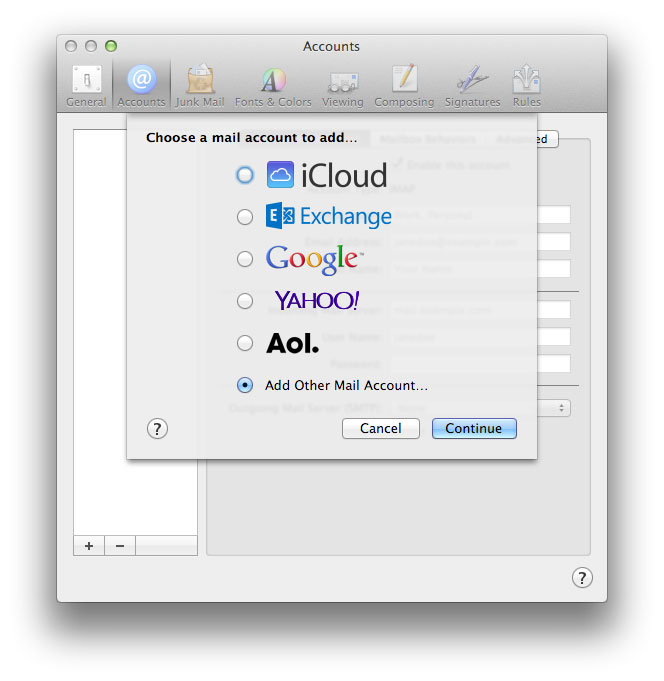
5. Click to select Add Other Mail Account….
6. Click Continue. The Add a mail accountdialog appears:
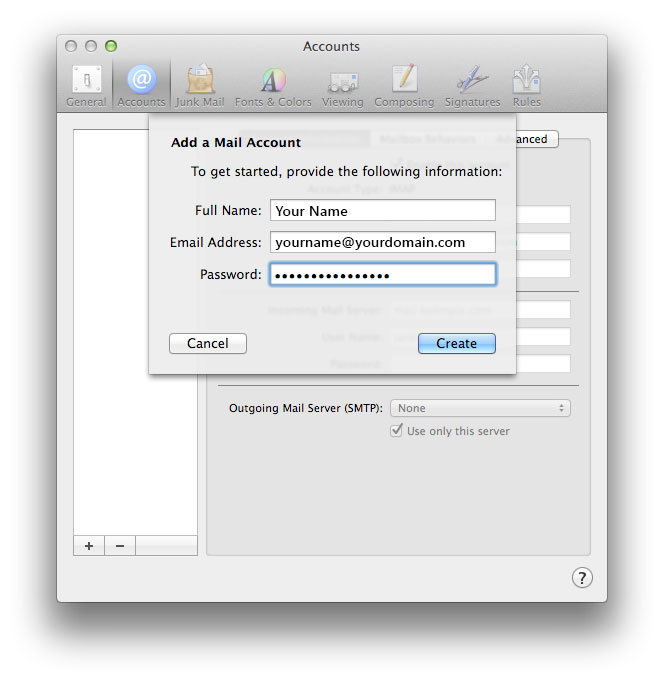
7. In the Full Name field, enter your name as you would like it to appear to recipients of your messages.
8. In the Email Address field, enter your email address.
9. In the Password field, enter your email password.
10. Click the Create button. A message, Account must be manually configured, appears.
11. Click the Next button. The Incoming Mail Server Info dialog appears.
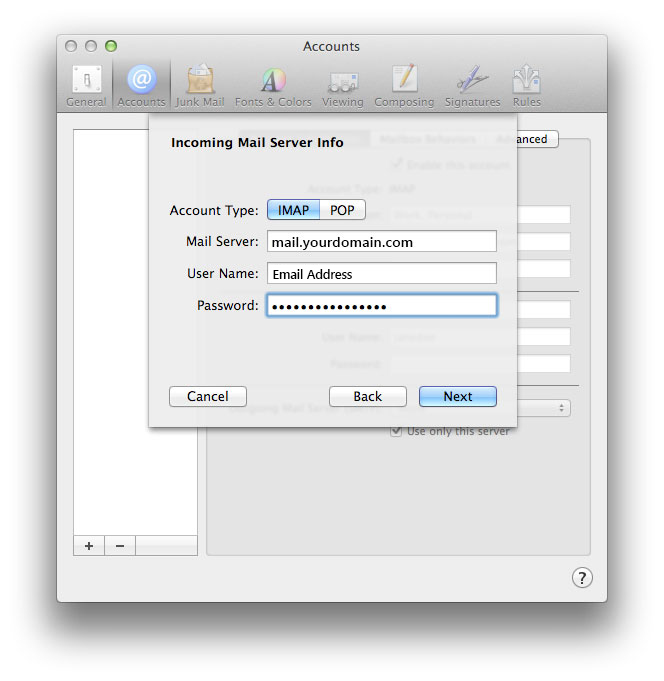
12. In the Account Type menu, click to select IMAP.
13. In the Mail Server field, enter mail.yourdomain.com.
14. In the User Name field, enter your email address.
15. In the Password field, enter your email password.
16. Click the Next button. The Outgoing Mail Server Info dialog appears:
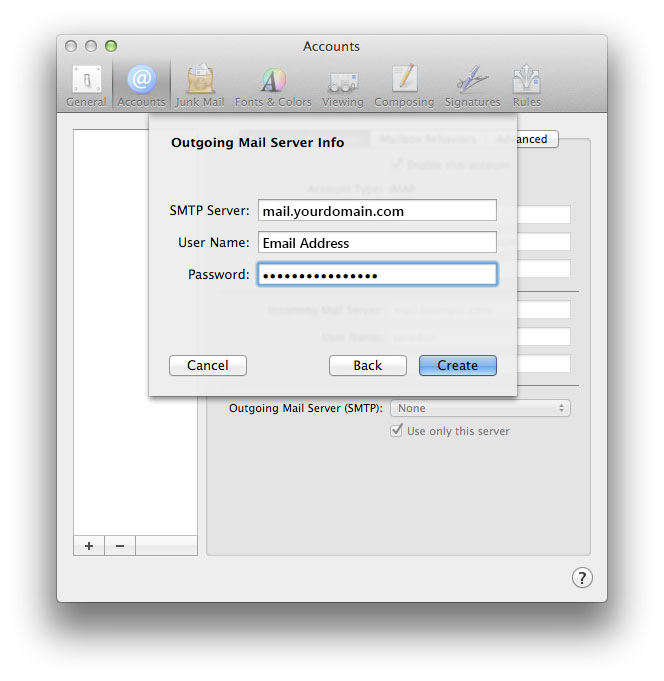
17. In the SMTP Server field, enter mail.yourdomain.com.
18. In the User Name field, enter your email address.
19. In the Password field, enter your email password.
20. Click the Create button. The mailbox is added to Mail’s list of accounts.
21. In the Outgoing Mail Server (SMTP) list, click to select Edit SMTP Server List…. The list of SMTP servers appears.
22. In the list, click to select mail.yourdomain.com.
23. Click the Advanced tab.
24. In the Authentication menu, click to select Password.
25. Click OK.
The account is now configured.