This website uses cookies for the purposes of web analysis, marketing and optimization of user-experience. The cookies are processed when the website is accessed. When the website opens, please click on 'Close' to allow the use of cookies during your visit. Detailed information about the methods used, your rights to withdrawal, your right to object and other rights can be found in our Privacy Policy.
This tutorial shows you how to set up Windows Mail to work with your Gmail account.
To Set Up Your Gmail Account in Windows Mail
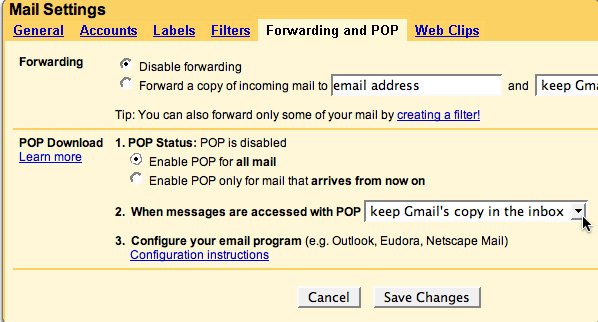
1. First we need to make sure your Gmail account is set up to enable POP (Post Office Protocol). In Gmail just go to mail settings and choose the Forwarding and POP tab. Click on one of the options to enable POP.
Update: Note the drop-down that says what to do when mail is accessed with POP3. Please do NOT change this to "Delete".
Click on Save Changes Button
2. Open Windows Mail.
3. Click the Tools menu, and select Accounts...
4. Click Add...
5. Select Email Account, and click Next.
6. Enter your name as you would like it to appear in the 'From:' field of outgoing messages, and click Next.
7. Enter your full Gmail address (username@gmail.com). Google Apps users, enter your full address in the format 'username@your_domain.com.'
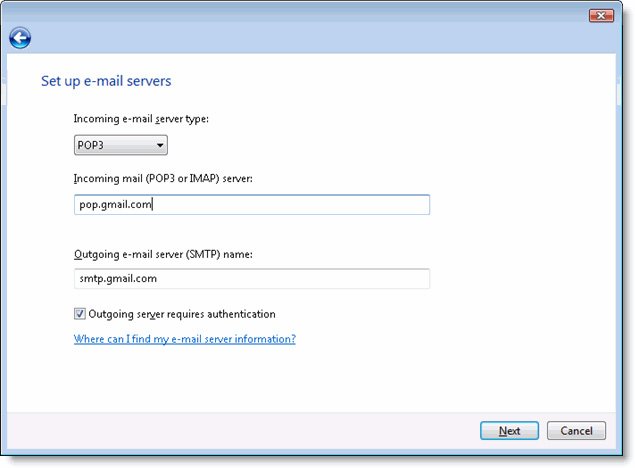
8. Fill in all necessary fields to include the following information:
Incoming mail server type: POP3
Incoming mail (POP3 or IMAP) server: pop.gmail.com. Google Apps users, enter the server name provided, don't add your domain name in these steps.
Outgoing e-mail server (SMTP) name: smtp.gmail.com
Outgoing server requires authentication: enabled
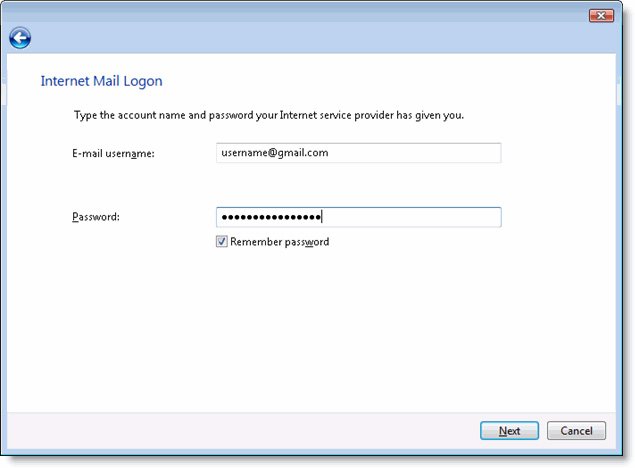
9. Click Next, and enter your full Gmail address (including '@gmail.com') and your Gmail password. Google Apps users, enter your full address in the format 'username@your_domain.com.'
10. Click Next, and then check the box next to Do not download my e-mail at this time. Click Finish.
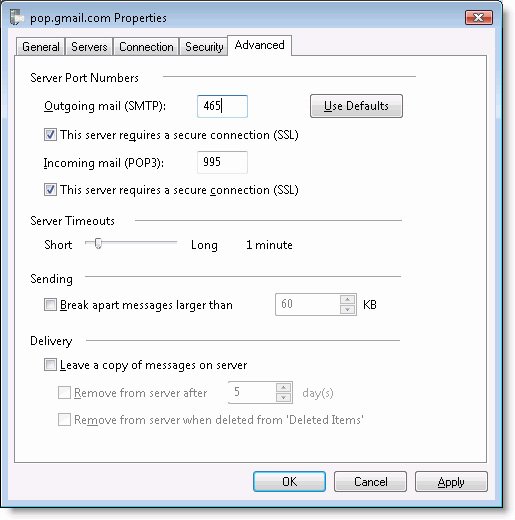
11. On the Internet Accounts screen, make sure that your pop.gmail.com mail account is selected, and click the Properties button.
12. On the Advanced tab, enter 465 in the in the box next to Outgoing mail (SMTP), and check the box next to This server requires an encrypted connection (SSL).
13. Check the box next to This server requires an encrypted connection (SSL) under Incoming mail (POP3). The box next to Incoming mail (POP3) should automatically update to 995.
Click OK. You're done! Close the Internet Accounts window and click Send/Receive to start checking your Gmail messages.
Subscribe to Our Newsletter!
Join us to stay updated with our latest blog updates, marketing tips, service tips, trends, news and announcements!