This website uses cookies for the purposes of web analysis, marketing and optimization of user-experience. The cookies are processed when the website is accessed. When the website opens, please click on 'Close' to allow the use of cookies during your visit. Detailed information about the methods used, your rights to withdrawal, your right to object and other rights can be found in our Privacy Policy.
Setting up your E-mail Account in Microsoft Outlook Express
This tutorial shows you how to set up Microsoft Outlook Express 6 to work with your e-mail account. This tutorial focuses on setting up Microsoft Outlook Express 6, but these settings are similar in other versions of Microsoft Outlook Express®. You can set up previous versions of Microsoft Outlook Express by using the settings in this tutorial.
To Set Up Your E-mail Account in Microsoft Outlook Express
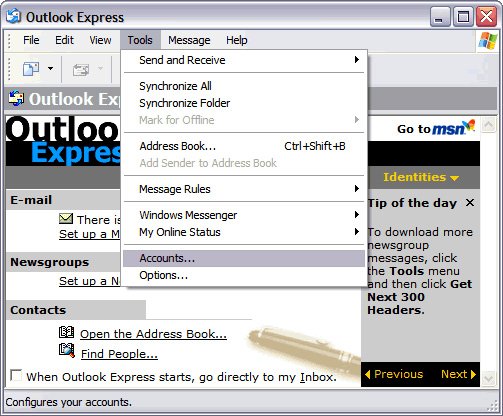
1. In Microsoft Outlook Express, from the Tools menu, select Accounts.
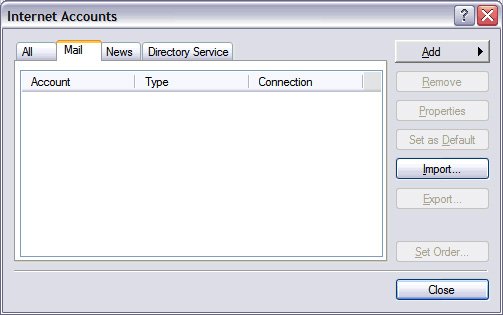
2. Go to the Mail tab and from the Add menu, select Mail.
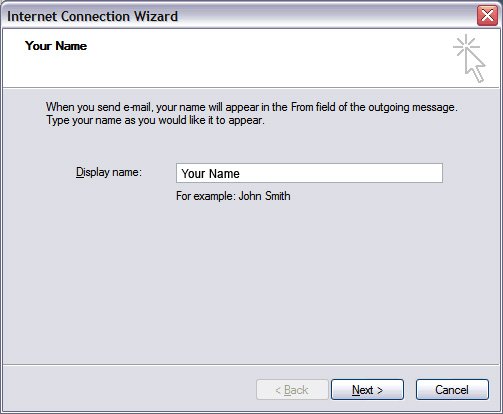
3. In the Display Name field, enter you full name and click Next.
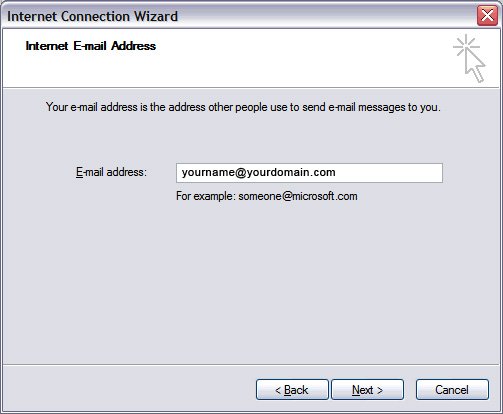
4. In the E-mail address field, enter your email address and click Next.
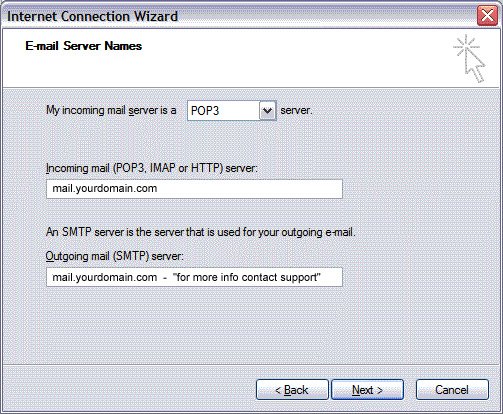
5. On the E-mail Server Names page, complete your information as follows:
My incoming mail server is a
POP3
Incoming mail (POP3, or HTTP) server
POP pop.yourdomain.com
Outgoing mail (SMTP) server
smtp.yourdomain.com
Click Next.
NOTE: "smtp.yourdomain.com" is an SMTP relay server. In order to use this server to send e-mails, you must first activate SMTP relay on your e-mail account. Log on to your Manage Email Accounts page to set up SMTP relay. If you do not have SMTP relay set up and your Internet Service Provider (ISP) allows it, you can use the outgoing mail server for your Internet Service Provider. Contact your Internet Service Provider to get this setting.
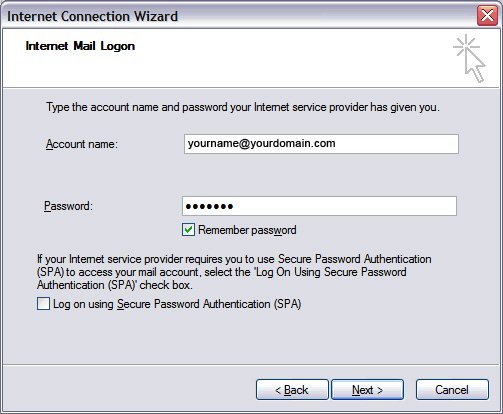
6. In the Account Name and Password fields, enter your email address and password, and then click Next.
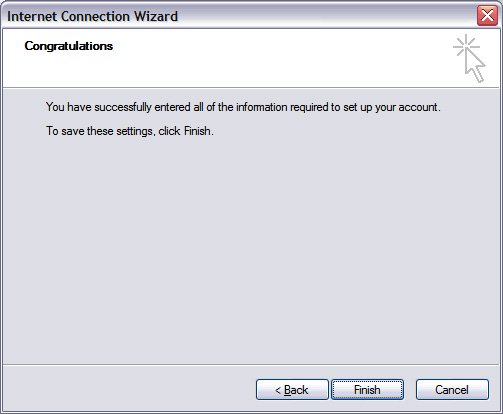
7. On the setup confirmation page, click Finish.
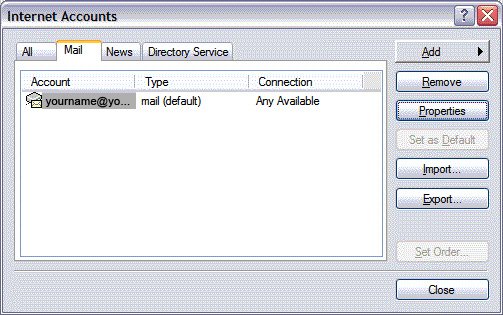
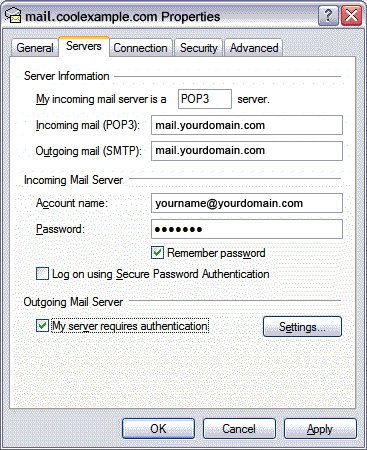
8. On the Mail tab, select the account you just created, and then click Properties.
9. Go to the Servers tab.
10. Select My server requires authentication, and then click Apply.
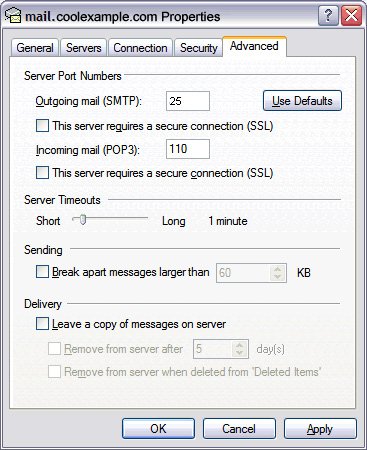
11. Go to the Advanced tab.
12. In the Server Port Numbers section, change Outgoing mail (SMTP) to 25, and then click OK.
13. (Optional) If you want to keep a copy of email messages stored on your email provider's servers, in the Delivery section, select Leave a copy of messages on server.
Your Outlook Express account is now set up. Click Close to close the Internet Accounts window and return to your Outlook Express.
NOTE: As a courtesy, we provide information about how to use certain third-party products, but we do not endorse or directly support third-party products and we are not responsible for the functions or reliability of such products. Outlook Express® is a registered trademark of Microsoft Corporation in the United States and/or other countries. All rights reserved.
Subscribe to Our Newsletter!
Join us to stay updated with our latest blog updates, marketing tips, service tips, trends, news and announcements!